Learn to Touch Type: A Beginner’s Guide to Faster, Accurate Typing
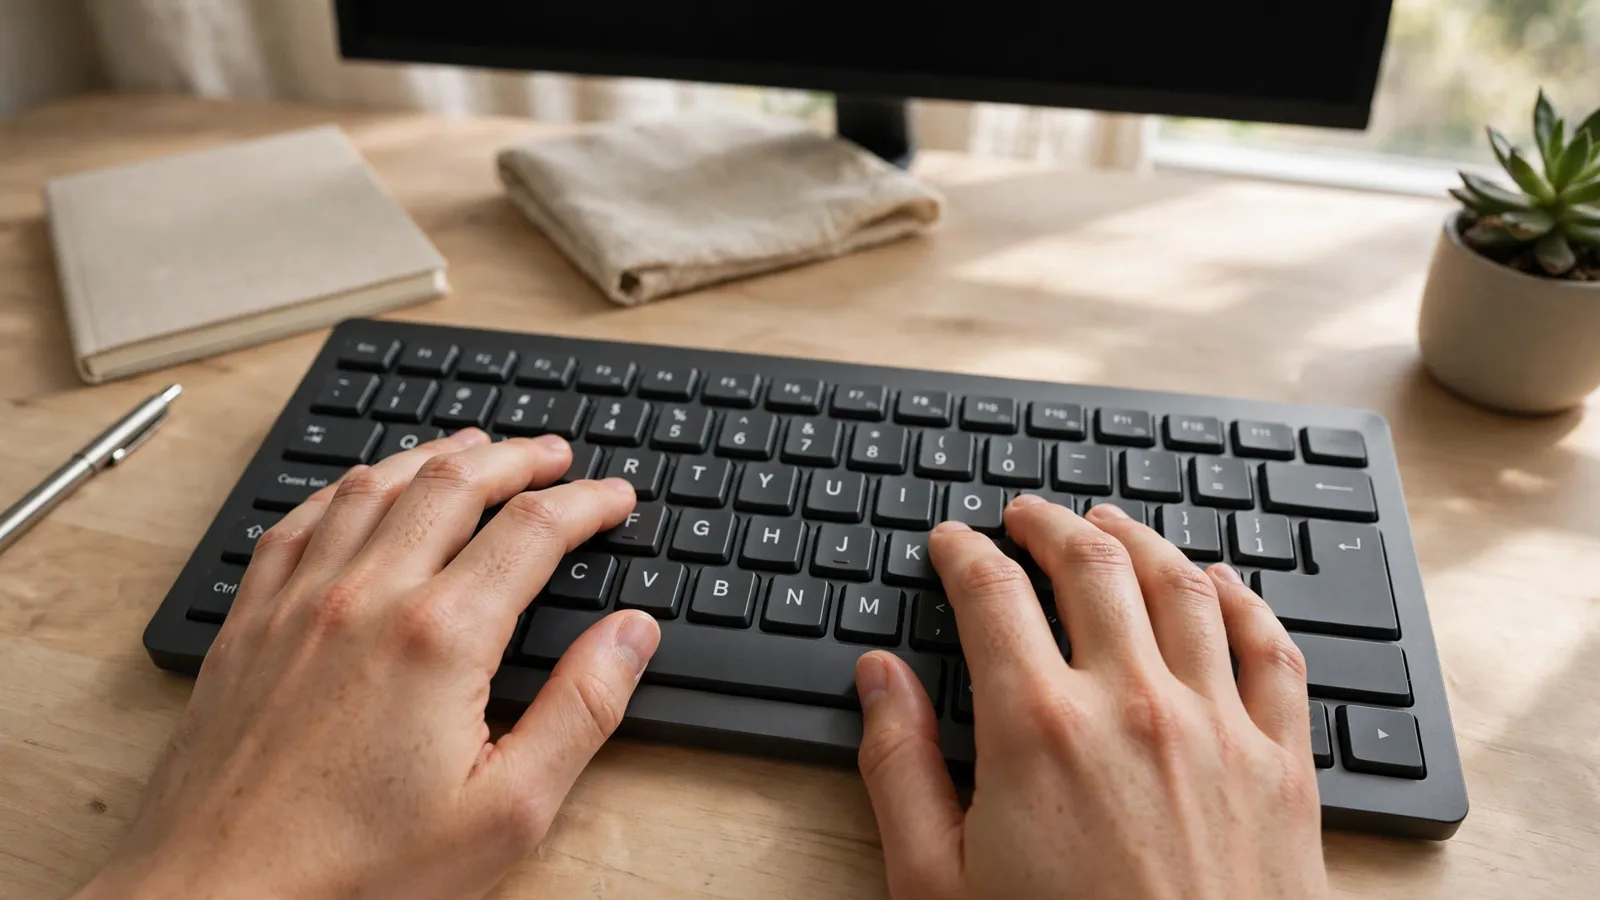
Touch typing means typing with all your fingers while your eyes stay on the screen or on the document you are copying from. Your fingers rest on a middle row of keys called the home row, each finger looks after a small patch of the keyboard, and words come out by habit rather than by searching. It looks effortless when someone else does it, but it is a learnable skill built from short, regular practice. Nobody is born knowing where the letter K lives.
Set your expectations honestly from the start. Accuracy comes first, and speed follows on its own once the movements are automatic. For the first week or two, the new method will probably feel slower than your old way of typing, because you are replacing a habit rather than adding one. Most learners find the corner turns within a few weeks of short daily sessions. This guide covers the setup, the finger positions, the order to learn the keys in, and a practice programme that fits into about 15 minutes a day.
Set up properly before you start
Good typing starts before your fingers move. Sit with your feet flat on the floor and your back supported by the chair. Your elbows should bend at roughly a right angle, with your forearms more or less level. Raise or lower the chair, or add a footrest or a cushion, until that feels natural rather than forced.
Position the screen so the top of it sits at about eye level and the screen is roughly an arm’s length away. If you work on a laptop at a desk all day, a separate keyboard and something to lift the laptop onto will get you closer to this than the laptop alone can. While you type, your wrists should float just above the keys in a neutral line with your forearms. Resting them on the desk edge mid-sentence presses on exactly the wrong spot, so save the wrist rest for pauses.
Ergonomics is not an optional extra here. NZQA’s entry-level keyboarding unit standard, 32000, pairs basic keyboarding skills with identifying ergonomic principles for the safe operation of computers, and its references point to ACC and WorkSafe guidance on using computers. If a national standard for beginners treats setup as part of the skill, it is worth your ten minutes too.
As for the keyboard itself, almost any standard QWERTY keyboard will do. Full-size keys with a bit of travel are easier to learn on than a cramped laptop keyboard, and a wired or wireless desktop keyboard is a cheap upgrade. You do not need an expensive mechanical keyboard to learn, and you definitely do not need to change to an alternative layout. Learn on the layout you will actually meet at work or school.
The home row: where your fingers live
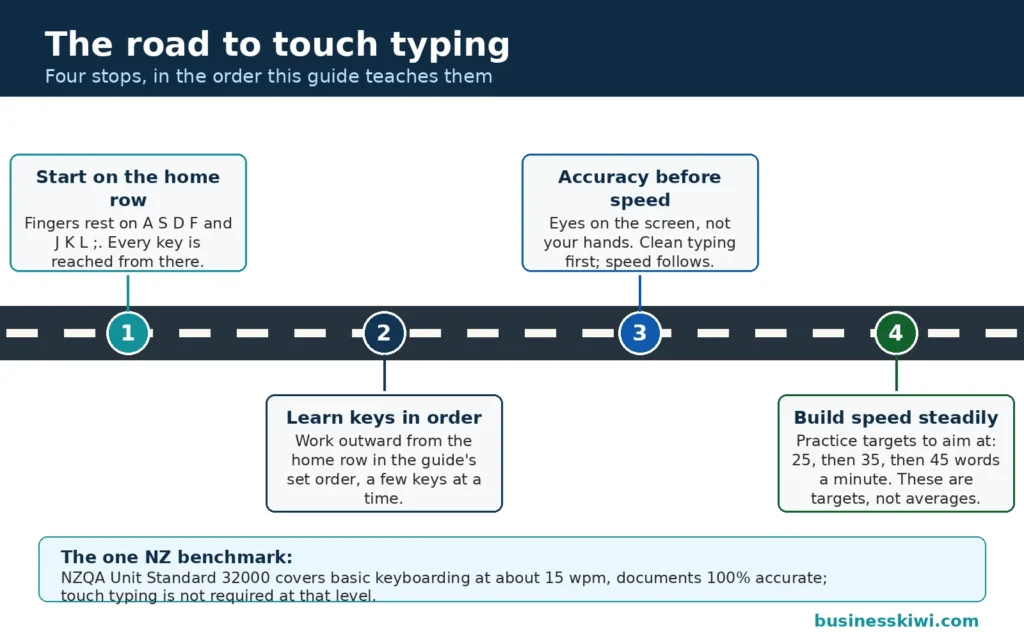
Place your left-hand fingers on A, S, D and F, and your right-hand fingers on J, K, L and the semicolon key. This is the home row, and every keystroke starts and ends here. Run your index fingers over F and J and you will feel a small raised bump on each key. Those bumps exist so you can find home without looking, which is the entire point of the exercise.
Each finger also owns the keys above and below its home key, plus a slice of the rows nearby. The index fingers do the most work, because each one covers two columns and helps with the number row.
Two habits matter more than any other. First, after every keystroke, let your fingers settle back onto the home keys rather than hovering over the last letter you typed. Second, use the Shift key with the little finger of the opposite hand to the letter you are capitalising. It feels awkward for a day or two, then it stops feeling like anything at all.

Learn the keys in this order
Stage one: the home row. For the first few sessions, type nothing but home row letters. Drill simple combinations, then short words built only from those letters: sad, fall, glad, salad, flask. It will feel limited, because it is. You are teaching eight fingers where home is.
Stage two: the top letter row. Add E and I first, since your middle and index fingers reach them easily, then work across Q, W, R, T, Y, U, O and P. Suddenly most common words are available to you, and drills can start to look like real sentences.
Stage three: the bottom letter row. Z, X, C, V, B, N and M complete the alphabet. The bottom row is where beginners most often cheat by looking, because the angles feel strange. Slow down instead of peeking.
Stage four: capitals and punctuation. Practise Shift with both little fingers, then the comma, full stop, apostrophe and question mark. Real writing is full of these, and a typist who stalls on every capital letter loses the flow the method is meant to create.
Stage five: the number row. Numbers come last because they are the least used in everyday prose and the longest reach. Learn them by position, and accept that the number row stays the slowest part of most people’s typing for a long time.
Why accuracy drills come before speed drills
Every error you type and leave uncorrected teaches your fingers a wrong movement. Speed built on wrong movements just produces mistakes faster, and fixing them costs more time than the speed saved. That is why the early weeks are about clean, careful typing at whatever pace keeps you accurate.
There is a formal echo of this in New Zealand’s own standard. Unit standard 32000 describes basic keyboarding as accurately keying in text at approximately 15 words per minute, and it requires the documents produced for assessment to be 100 percent accurate, with a chance to proofread before submitting. The emphasis is deliberate: get it right, then get it fast. Note, too, that the standard says touch typing is not required at that level. Touch typing is the step beyond basic keyboarding, the one that makes higher speeds possible without your eyes leaving the page.
Three beginner errors, and how to fix them
Looking down. This is the big one. Cover your hands with a tea towel or a light scarf during drills, or rest a sheet of paper over them like a tent. If you cannot see the keys, your fingers have to learn the distances, which is the skill itself.
Falling back on two fingers when it matters. Under pressure, perhaps typing something real for work, the old method creeps back. The fix is boring: slow down to the speed where the new method holds, even for real tasks, until it holds at every speed.
Tensing up and hammering the keys. Shoulders creeping toward ears, forearms rigid, keys struck hard enough to hear in the next room. Shake your hands out between drills, drop your shoulders, and type with a light touch. Tension is tiring, and tired fingers make errors.
A practice programme: about 15 minutes a day
Short and daily beats long and occasional. Fifteen focused minutes every day will move you further than an hour once a week, because the learning happens between sessions as much as during them. A simple session looks like this: two minutes warming up on the home row, eight minutes on drills for whichever stage you are up to, four minutes typing real text such as an email draft or a page from a book, and a final minute testing yourself and noting the result.
- Weeks 1–2: Home row only, then home row plus E and I. Your only goal is typing without looking, however slowly.
- Weeks 3–4: The full top row, then the bottom row. By the end of this block you can type any letter, and drills become words and sentences.
- Weeks 5–6: Capitals and punctuation woven into sentence practice. Start typing real things: messages, notes, study summaries.
- Weeks 7–8: The number row, mixed practice, and regular timed tests of your own typing. From here on, it is refinement rather than new learning.
Treat those week blocks as a suggested programme, not a promise. If a stage needs ten days instead of seven, give it ten days. Moving on while a row is still shaky just exports the problem to everything you type afterwards.
How to measure your progress
Two numbers tell you almost everything. Accuracy is the percentage of keystrokes or words you type correctly, and it is the number to protect. Words per minute, usually shortened to wpm, counts your speed: take the number of characters you typed, divide by five (the standard convention treats five characters, including spaces, as one word), then divide by the minutes you spent typing. Some tests report a net speed that deducts errors from the gross figure. Either way, compare like with like and track your own results over time.
Set your own milestones rather than chasing anyone else’s numbers. A sensible ladder of targets might be: finish the home row without looking, then type full sentences cleanly, then reach a steady 25 wpm at 95 percent accuracy or better, then 35 wpm, then 45 wpm. Those are goals to aim at in your own practice, not statistics about other typists. If you want a formal reference point, the NZQA figure above, around 15 wpm for basic keyboarding with complete accuracy, is where the official ladder starts.
When you choose a practice tool, look for structured lessons that introduce keys gradually, feedback on accuracy as well as speed, and plain drills without gimmicks. Plenty of free tools do all of that well. Paid options sometimes add polish, progress tracking or a tidier interface, but paying more does not teach your fingers faster. Avoid anything that throws speed tests at you before it has taught you where the keys are.
Where touch typing pays off
Any job built around a keyboard rewards the skill quietly, all day. Tahatū, the national careers site, describes administration and customer services work as covering tasks such as transcription and data entry, and those are roles where the typing never really stops. Report writing, minute taking, email-heavy office jobs and customer support all involve hours of keyboard work, and the person who can type while looking at the customer, the document or the screen simply gets through more of it with less strain.
For students the payoff is just as direct. Notes come out fuller when you can keep up with a lecture, and essays are less painful when the typing stops competing with the thinking. If you are training toward administration work, the NZQA keyboarding standards (32000, and 32001 on composing and managing documents) are the formal qualifications sitting underneath this skill, usually taught through schools and training providers.
When you job hunt, an honestly measured typing speed and accuracy figure is a legitimate line in the skills section of your CV, provided you can repeat the performance in a test. Our NZ CV template guide shows where a line like that belongs.
Children and teenagers
Keyboard skills now sit inside ordinary schoolwork. The Ministry of Education’s parent guide for Year 7 English suggests, as a home activity, practising keyboard skills by typing and publishing your child’s work on a computer at home or in the library. NZQA has also identified competent keyboarding as one of the key skills students need as more assessment moves online, so the teenager who types well is not just faster at homework, they are calmer in a digital exam room.
The advice that follows is general guidance for parents rather than anything official. Start children on the home row with short, game-like sessions and stop while it is still fun. Match the setup to their size: feet supported, screen raised, a standard keyboard rather than a tiny one if you can manage it. Praise accuracy, not raw speed, and expect progress in bursts. A child who types a story or a letter to a grandparent is practising with a purpose, which always beats drills alone.
If the standard method does not suit your body
Touch typing assumes two hands and a standard layout, and neither is universal. One-handed typing is a real and workable approach: some people train their stronger hand on the standard layout, recentring it around F, G, H and J, and some operating systems and typing programs offer one-handed layouts designed for the purpose. Alternative layouts such as Dvorak rearrange the letters to put common ones under stronger fingers, and switching is a legitimate choice, though it means relearning positions from scratch and most people manage perfectly well on QWERTY.
Hardware can help too. Split and angled ergonomic keyboards let your hands sit in a more natural line, and larger-key keyboards suit some users better. Voice dictation is a useful partner rather than a rival: dictate the draft, then use the keyboard for editing. Above all, keep the ergonomic basics from the setup section, take short breaks during long sessions, and treat persistent pain as a signal to stop and get proper advice rather than something to type through.
Frequently asked questions
How long does it take to learn to touch type?
Most of the learning happens in the first several weeks of short daily practice: home row in the first fortnight, the full alphabet within about a month, then steady improvement from there. Treat that as a rough shape rather than a guarantee. Your speed keeps building for months afterwards simply from typing in your normal day.
What typing speed should I aim for?
Aim in stages and protect your accuracy as you go: clean sentences first, then targets such as 25, 35 and 45 wpm at 95 percent accuracy or better. There is no official New Zealand average to chase. The closest formal benchmark is NZQA’s entry-level keyboarding standard, which works on approximately 15 wpm typed accurately.
Should I learn on a laptop keyboard or a full-size one?
Either works, and learning on the keyboard you use most is the smartest choice. A full-size keyboard gives your fingers a little more room and is kinder to your posture at a desk, but the finger positions are identical, so the skill transfers between keyboards once you have it.
I have typed with two fingers for years. Is it too late to change?
No, but expect a frustrating fortnight. Your old method will be faster at first, and the temptation to switch back for anything urgent is strong. Stick with the new method for practice and, as soon as you can, for real typing too. The crossover point, where touch typing passes your old speed, usually arrives sooner than people fear.
Do I need to pay for a course or a program?
No. Structured free tools cover the same ground: staged lessons, accuracy feedback and timed practice. Paying can buy a nicer interface or better progress tracking, and a tutor-led course may suit you if you learn best with a teacher in the room. The method itself is the same either way, and it is the daily practice that does the work.
Sources
- NZQA, Unit Standard 32000: Enter prescribed text accurately using basic keyboarding skills and identify safe ergonomic practices (Level 1, 3 credits), nzqa.govt.nz
- NZQA, Unit Standard 32001: Compose and manage text to produce documents using basic keyboarding and layout skills, nzqa.govt.nz
- NZQA, Advice on digital fluency requirements to inform curriculum development, nzqa.govt.nz
- Ministry of Education, English in Year 7 (guide for parents), education.govt.nz
- Tahatū, Administration and customer services work area, tahatu.govt.nz
The official sources above cover the New Zealand facts in this article: the qualification standards, the school guidance and the careers information. Everything else, the setup advice, finger positions, drills and practice programme, is general instruction written for this guide, and the speed figures in it are personal targets to aim at, not measurements of other people.
Find more study and career guides in our Jobs & Education hub.